Your Paver Sealing Checklist for Long Island, New York Projects
Complete guide to paver sealing success on Long Island, from preparation through professional application techniques.
Share:
Summary:
When Your Long Island Pavers Need Sealing
Your pavers are sending you signals, but are you reading them correctly? Most Long Island homeowners wait too long, thinking minor issues will resolve themselves.
The truth is that timing makes all the difference between affordable maintenance and expensive replacement. We look for specific indicators that tell the real story about your pavers’ condition and urgency level.
Signs Your Pavers Are Crying for Help
Walk your property with fresh eyes and look for these telltale warning signs. Fading color is often the first indicator, especially on south-facing surfaces that bear the brunt of UV exposure. What starts as subtle color loss accelerates quickly in Long Island’s intense summer sun.
Water absorption tells the bigger story. Sprinkle water on your pavers and watch what happens. If it soaks in immediately instead of beading up, your pavers have become porous and vulnerable. This means moisture is penetrating deep into the material, setting up freeze-thaw damage when winter arrives.
Staining becomes increasingly difficult to remove from unsealed pavers. Oil spots from cars, rust stains from metal furniture, and organic stains from leaves create permanent discoloration. Once stains penetrate the paver surface, standard cleaning can’t reach them.
Joint sand erosion creates structural problems that go beyond appearance. When sand washes out from between pavers, the entire surface becomes unstable. You’ll notice pavers shifting underfoot or developing uneven spots that collect water and debris.
Weed growth between joints indicates that your paver system has lost its protective barriers. Weeds don’t just look unsightly – their root systems create pressure that can crack pavers and destabilize your entire hardscape investment.
The Long Island Climate Factor
Walk your property with fresh eyes and look for these telltale warning signs. Fading color is often the first indicator, especially on south-facing surfaces that bear the brunt of UV exposure. What starts as subtle color loss accelerates quickly in Long Island’s intense summer sun.
Water absorption tells the bigger story. Sprinkle water on your pavers and watch what happens. If it soaks in immediately instead of beading up, your pavers have become porous and vulnerable. This means moisture is penetrating deep into the material, setting up freeze-thaw damage when winter arrives.
Staining becomes increasingly difficult to remove from unsealed pavers. Oil spots from cars, rust stains from metal furniture, and organic stains from leaves create permanent discoloration. Once stains penetrate the paver surface, standard cleaning can’t reach them.
Joint sand erosion creates structural problems that go beyond appearance. When sand washes out from between pavers, the entire surface becomes unstable. You’ll notice pavers shifting underfoot or developing uneven spots that collect water and debris.
Weed growth between joints indicates that your paver system has lost its protective barriers. Weeds don’t just look unsightly – their root systems create pressure that can crack pavers and destabilize your entire hardscape investment.
Professional Paver Sealing Process
Real paver sealing success depends on following a systematic approach that addresses every variable. Cutting corners or skipping steps leads to premature failure and wasted money.
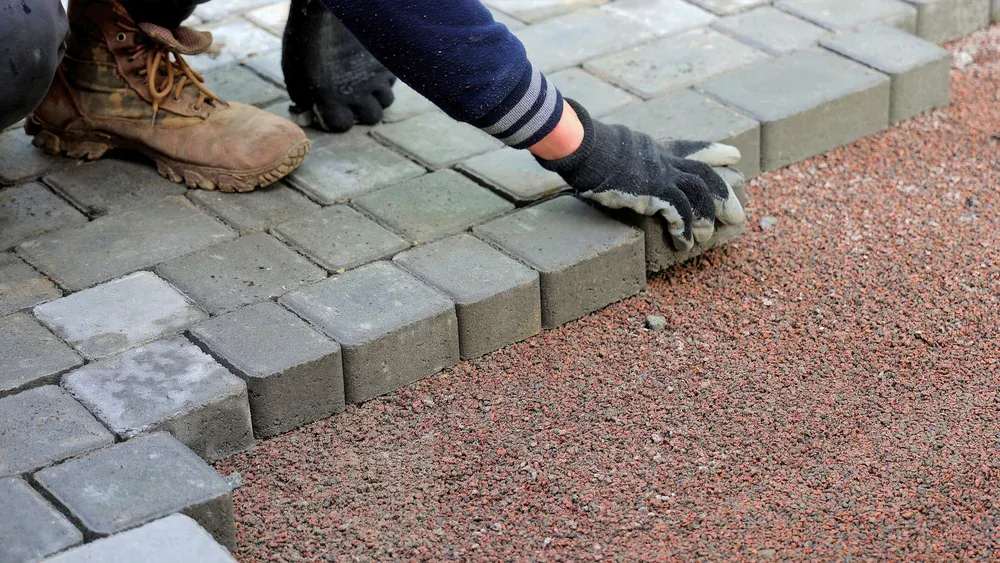
The process begins long before any sealer touches your pavers. Professional preparation work determines whether your sealing job lasts two years or fifteen years.
Deep Cleaning That Actually Works
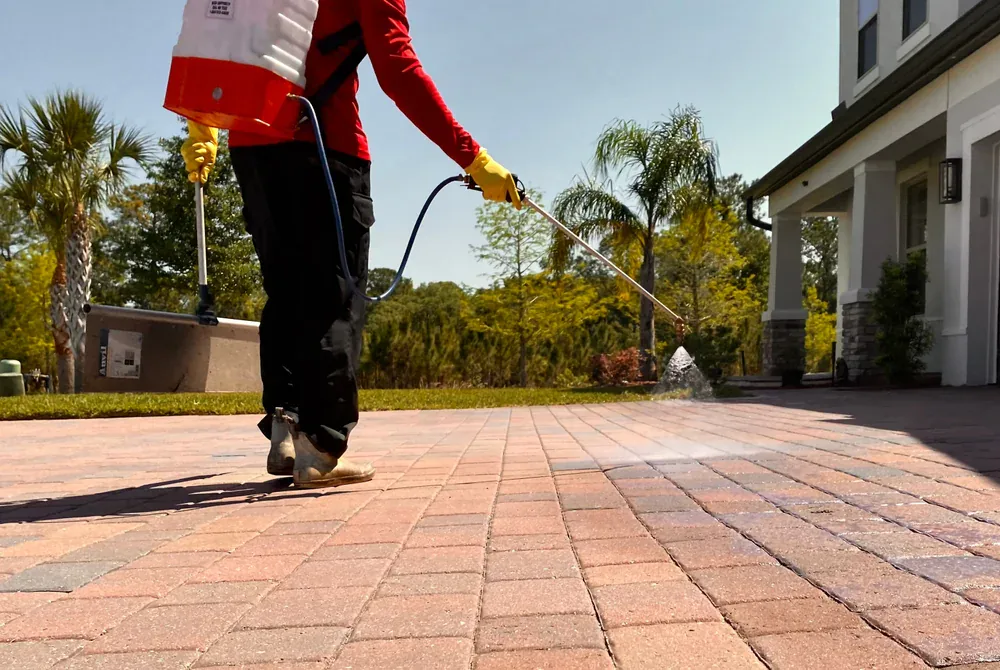
Surface cleaning won’t cut it for proper sealing preparation. We use hot water pressure washing systems that penetrate deep into paver pores, removing embedded dirt, oil, and organic matter that standard cleaning misses.
The pressure and temperature settings require careful calibration for different paver materials. Concrete pavers can handle higher pressures than natural stone, while brick pavers need specialized techniques to avoid damage. Using the wrong approach can create surface damage that shows through the sealer.
Stain removal happens before general cleaning, not after. Oil stains, rust marks, and organic discoloration require specific treatments that break down the staining compounds at the molecular level. Once these treatments work, pressure washing removes the loosened contaminants.
Joint cleaning removes all old sand and debris from between pavers. This step can’t be rushed because any remaining contamination will prevent proper polymeric sand installation. We use specialized tools that clean joints thoroughly without damaging paver edges.
Efflorescence removal addresses the white, chalky deposits that appear on many concrete and brick pavers. These mineral deposits must be completely removed because they prevent proper sealer adhesion. Specialized cleaners dissolve efflorescence without damaging the paver surface.
The final rinse removes all cleaning residues and allows us to inspect the surface for any remaining issues. Pavers must be completely clean and dry before sealing begins, which typically requires 24-48 hours of drying time depending on weather conditions.
Sealer Selection and Application Techniques
Not all sealers work the same in Long Island’s challenging environment. Water-based sealers offer excellent UV protection and low odor, making them ideal for residential applications. They cure quickly and allow pavers to breathe, preventing moisture problems in our humid climate.
Solvent-based sealers provide superior chemical resistance and deeper penetration, making them excellent choices for driveways and commercial applications. They take longer to cure but offer enhanced durability against salt, oil, and other harsh chemicals common in our area.
Application technique separates professional results from amateur disasters. Proper coverage requires multiple thin coats rather than one heavy application. Each coat must cure completely before the next application, which requires patience and weather awareness.
Temperature and humidity conditions during application affect the final results dramatically. Ideal conditions include temperatures between 50-80 degrees with low humidity and no precipitation forecast for 24 hours. We monitor weather closely and adjust schedules accordingly.
Equipment quality makes a significant difference in application consistency. Professional-grade sprayers and rollers ensure even coverage without streaking or puddling. The investment in proper equipment pays dividends in final appearance and longevity.
Quality control during application involves constant monitoring of coverage rates, environmental conditions, and material performance. We recognize potential problems before they become permanent issues, adjusting techniques as needed to ensure optimal results.
Protecting Your Long Island Paver Investment
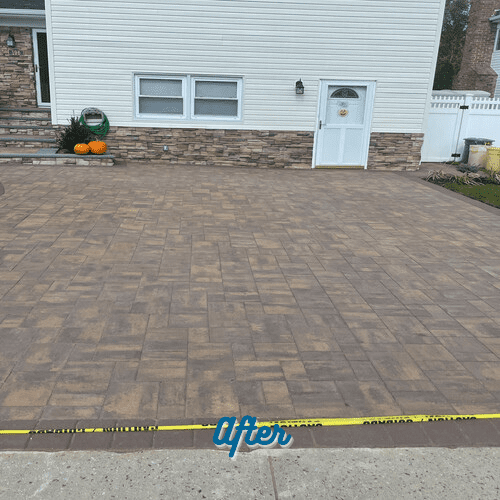
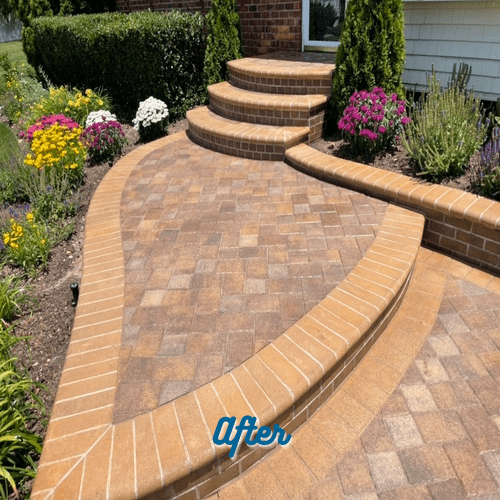
Your paver sealing project represents more than maintenance – it’s insurance for your substantial hardscape investment. When done correctly using professional techniques and quality materials, sealing extends paver life by 10-15 years while maintaining the beauty you paid for.
The difference between success and failure often comes down to experience with Long Island’s specific challenges. Our coastal climate, freeze-thaw cycles, and seasonal weather patterns require specialized knowledge that only comes from years of local experience.
For Long Island homeowners ready to protect their paver investment with professional results, we bring nearly 50 years of combined experience to every project, ensuring your hardscapes receive the expert care they deserve.
Article details:
- Published by:
- Paver Savers
- Published to:
- Last modified:
- November 3, 2025
Share:
Continue learning: