Winter-Proofing Your Long Island Hardscape: The Role of Paver Sealing Against Salt and Snow
Long Island's harsh winters wreak havoc on unsealed pavers. Discover how professional paver sealing creates a protective barrier against salt damage, freeze-thaw cycles, and expensive hardscape repairs.
Share:
Summary:
How Long Island Winters Damage Unsealed Pavers
Long Island sits in a perfect storm zone for paver damage. You’ve got coastal moisture meeting inland temperature swings, creating conditions that accelerate deterioration faster than most regions. Your pavers might look solid, but they’re actually porous, absorbing water like a sponge you can’t see.
When temperatures hover around freezing, which happens constantly through Long Island winters, that absorbed water goes through repeated freeze-thaw cycles. Water expands about 9% when it freezes, creating internal pressure that cracks pavers from the inside out. This isn’t a one-time event. Nassau and Suffolk Counties experience 30 to 40 freeze-thaw cycles each winter, meaning your pavers face this stress dozens of times per season.
Then there’s the salt. Road crews spread tons of de-icing chemicals across Long Island every winter, and that salt doesn’t just disappear when spring arrives. It penetrates deep into porous paver surfaces, causing gradual corrosion and that characteristic white, chalky appearance. The chemical assault breaks down the paver material itself, leading to what professionals call spalling—when the surface literally chips and flakes away.
What Spalling Looks Like and Why It Happens
Spalling shows up as surface chipping, flaking, or peeling on your pavers. You might notice small pits at first, then larger sections where the top layer has broken off completely, exposing the aggregate underneath. It’s not just ugly—it’s progressive. Once spalling starts, it accelerates with each passing season.
The science behind spalling is straightforward but destructive. When salt-laden water penetrates your pavers and then freezes, the expanding ice creates tremendous pressure—up to 30,000 pounds per square inch. That force has to go somewhere, and it goes outward, pushing against the paver’s surface layer. The surface is the weakest point, so it gives way first, creating those characteristic chips and flakes.
What makes this particularly frustrating for Long Island homeowners is how quickly it happens. Pavers that looked perfect can develop significant spalling after just one harsh winter if they’re not properly sealed. The damage compounds because once the surface is compromised, even more water can penetrate deeper into the paver, causing more extensive damage during the next freeze.
You’ll typically see spalling first in high-traffic areas like driveway aprons or near walkway edges where salt accumulates and water pools. But left unchecked, it spreads across the entire surface. The coastal influence in Nassau and Suffolk Counties adds another complication—salt air accelerates the breakdown of any protective barriers, leaving pavers even more vulnerable to moisture penetration and subsequent freeze damage.
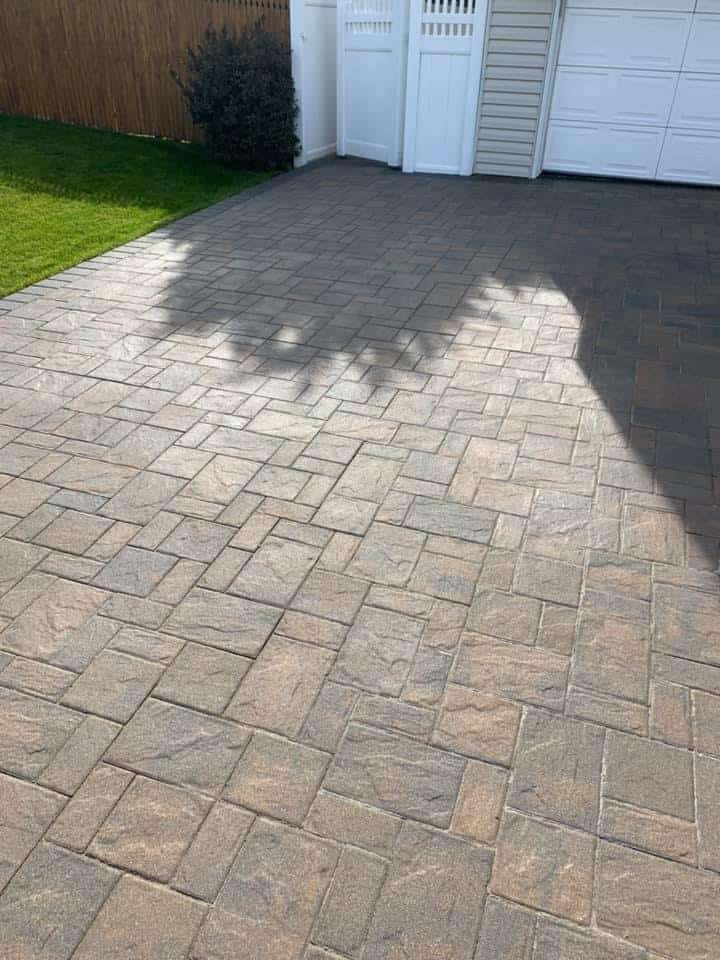
The key thing to understand is that spalling isn’t cosmetic damage you can ignore. It’s structural deterioration that shortens your pavers’ lifespan dramatically. Unsealed pavers can fade and spall to the point where they look like bare concrete in just seven years, especially under Long Island’s challenging conditions. Professional paver sealing prevents this entire cycle by creating a water-repellent barrier that keeps moisture and salt on the surface where they can’t cause internal damage.
The Freeze-Thaw Cycle Explained for Long Island Conditions
Spalling shows up as surface chipping, flaking, or peeling on your pavers. You might notice small pits at first, then larger sections where the top layer has broken off completely, exposing the aggregate underneath. It’s not just ugly—it’s progressive. Once spalling starts, it accelerates with each passing season.
The science behind spalling is straightforward but destructive. When salt-laden water penetrates your pavers and then freezes, the expanding ice creates tremendous pressure—up to 30,000 pounds per square inch. That force has to go somewhere, and it goes outward, pushing against the paver’s surface layer. The surface is the weakest point, so it gives way first, creating those characteristic chips and flakes.
What makes this particularly frustrating for Long Island homeowners is how quickly it happens. Pavers that looked perfect can develop significant spalling after just one harsh winter if they’re not properly sealed. The damage compounds because once the surface is compromised, even more water can penetrate deeper into the paver, causing more extensive damage during the next freeze.
You’ll typically see spalling first in high-traffic areas like driveway aprons or near walkway edges where salt accumulates and water pools. But left unchecked, it spreads across the entire surface. The coastal influence in Nassau and Suffolk Counties adds another complication—salt air accelerates the breakdown of any protective barriers, leaving pavers even more vulnerable to moisture penetration and subsequent freeze damage.
The key thing to understand is that spalling isn’t cosmetic damage you can ignore. It’s structural deterioration that shortens your pavers’ lifespan dramatically. Unsealed pavers can fade and spall to the point where they look like bare concrete in just seven years, especially under Long Island’s challenging conditions. Professional paver sealing prevents this entire cycle by creating a water-repellent barrier that keeps moisture and salt on the surface where they can’t cause internal damage.
How Professional Paver Sealing Creates Winter Protection
Professional paver sealing isn’t just spraying a coating and calling it done. It’s a comprehensive process that addresses the root causes of winter damage. The sealer itself creates a protective barrier on and within the paver surface, but proper application makes the difference between protection that lasts three to five years versus a DIY job that breaks down in six months.
The sealer works by penetrating into the paver’s pores and creating a water-repellent barrier. Think of it like waterproofing—moisture beads up and rolls off instead of soaking in. This keeps water on the surface where it can evaporate or drain away harmlessly, rather than penetrating deep where it can freeze and cause damage. Quality sealers also block salt and de-icing chemicals from penetrating, preventing the chemical corrosion that leads to spalling.
Beyond the sealer itself, professional application includes polymeric sand in the joints between pavers. This isn’t regular sand—it contains binding agents that harden when activated with water, creating stable joints that resist erosion and block weed growth. The hardened joints prevent water from infiltrating between pavers and getting into the base layer, which is critical for preventing shifting during freeze-thaw cycles.
The Complete Sealing Process for Long Island Pavers
Professional paver sealing starts with thorough surface preparation, which is where most DIY attempts fall short. The pavers need to be completely clean for the sealer to bond properly. This means hot water pressure washing to remove all dirt, grime, organic growth, old sealer residue, and that white efflorescence that appears on many pavers. Commercial-grade equipment penetrates deep into the paver’s pores, lifting and removing even stubborn contamination.
Once the surface is clean, any damaged pavers get replaced and repairs are made. There’s no point sealing over cracked or spalled pavers—the damage will just continue underneath. This is also when we assess your joint sand situation. If the sand has washed out or settled significantly, it needs to be removed and replaced with fresh polymeric sand before sealing.
The polymeric sand application is critical for winter protection. After removing old sand, we fill the joints completely with polymeric sand, sweep off any excess from the paver surface, and then activate it with a fine mist of water. The activation process causes the binding agents to harden, creating joints that lock pavers in place while still allowing the slight flexibility needed to handle ground movement. These hardened joints prevent water infiltration, resist washout during spring rains, and block weeds and ants from tunneling through.
After the polymeric sand has cured, which typically takes 24 to 48 hours, the sealer application begins. Professional-grade sealers designed for Long Island’s climate get applied in even coats using proper equipment—usually a sprayer that ensures uniform coverage. The sealer needs to penetrate the paver surface while also creating a protective film on top. This dual-layer protection is what provides lasting results.
Application timing matters significantly. The pavers need to be completely dry, and weather conditions need to cooperate. You can’t seal in extreme heat, cold, or when rain is forecast within 24 hours. We know how to read conditions and schedule work when the sealer will cure properly. We also know the right application rate—too little sealer leaves gaps in protection, while too much creates a thick, unnatural-looking film that can peel or trap moisture.
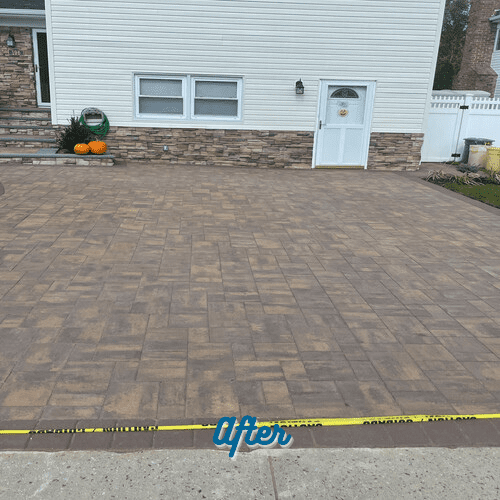
The entire process typically takes two to three days from start to finish, depending on the size of your project and weather conditions. You’ll need to stay off the pavers during this time to allow proper curing. The result is a protected surface that repels water, resists stains, maintains color, and stands up to Long Island winters for three to five years before needing reapplication.
Choosing the Right Sealer for Snow and Salt Exposure
Not all paver sealers perform equally in Long Island’s winter conditions. The right sealer for this climate needs specific characteristics that address salt exposure, freeze-thaw cycles, and coastal humidity. Water-based urethane sealers typically perform best for Long Island applications because they’re environmentally safe, VOC-compliant, and provide excellent protection without the harsh chemicals found in some solvent-based products.
The sealer needs to be breathable, meaning it allows moisture vapor to escape while still blocking liquid water from entering. This matters because pavers can have residual moisture inside them, and that moisture needs a way out. A non-breathable sealer can trap moisture inside, which then freezes and causes damage from within—exactly what you’re trying to prevent. Breathable sealers with lower solid content allow this vapor transmission while still providing surface protection.
Salt resistance is non-negotiable for Long Island pavers. The sealer needs to create a barrier that prevents salt and de-icing chemicals from penetrating into the paver’s pores where they can cause chemical damage. Quality sealers designed for northern climates include additives that specifically resist salt penetration, protecting against the corrosion that leads to spalling. This is one area where DIY store-bought products often fall short—they’re not formulated for the heavy salt exposure that Long Island pavers face.
UV resistance matters too, even though we’re talking about winter protection. Long Island gets intense summer sun, and UV rays break down sealers over time. A sealer that degrades significantly during summer won’t provide adequate protection when winter arrives. Professional-grade sealers include UV inhibitors that maintain their protective properties through multiple seasons, which is why they last three to five years compared to six to twelve months for basic products.
The finish type affects both appearance and performance. Wet-look sealers create a glossy, color-enhanced finish that makes pavers look vibrant and new. They contain higher solid content for maximum protection and dramatic aesthetic improvement. Natural-look sealers provide protection without changing the appearance, maintaining the original matte finish of your pavers. For winter protection specifically, both types work equally well—the choice comes down to your aesthetic preferences and safety considerations, since wet-look finishes can be slightly more slippery when wet.
Application rate and coverage also vary by sealer type. Professional sealers typically cover 150 to 300 square feet per gallon depending on paver porosity and desired finish. Proper coverage ensures complete protection without over-application that wastes product and creates an unnatural appearance. We know how to adjust application rates based on your specific paver type, existing condition, and exposure to the elements.
The investment in professional-grade sealer pays off in longevity and performance. While DIY products might seem cost-effective at $30 to $50 per gallon, they require annual reapplication and provide inferior protection. Professional sealers cost more per gallon but last multiple years and actually protect your pavers through Long Island’s challenging winters, preventing the expensive damage that makes cheap sealer a false economy.
Protecting Your Paver Investment Before the Next Winter
Your pavers represent a significant investment—typically $10,000 or more for a driveway or patio. Professional paver sealing costs a fraction of that while extending your pavers’ lifespan by 10 to 15 years. The math is straightforward: spending $500 to $1,500 on sealing every few years prevents the $8,000 to $12,000 replacement cost that comes from neglecting winter protection.
Long Island’s climate doesn’t give unsealed pavers a fighting chance. Between 30 to 40 freeze-thaw cycles each winter, heavy salt exposure, and coastal humidity, your hardscape faces constant assault. Professional paver sealing creates the barrier your pavers need to survive these conditions without developing spalling, cracks, or structural shifting.
The best time to seal is before damage becomes visible. Once you’re seeing significant spalling or cracks, you’re already in repair mode rather than prevention mode. If your pavers are more than a year old and have never been sealed, or if it’s been three or more years since the last application, now is the time to act. We bring nearly 50 years of combined experience to every project, using professional-grade products and techniques specifically designed for Long Island conditions. Protect your investment before the next winter tests your pavers again.
Article details:
- Published by:
- Paver Savers
- Published to:
- Last modified:
- March 16, 2026
Share:
Continue learning: