How to Pressure Wash a Paver Driveway Without Causing Damage
Not all pavers clean the same way. Here's what Nassau County homeowners need to know before touching a pressure washer.
Share:
Summary:
Your paver driveway looked great when it was installed. Now it’s got green stains creeping in from the edges, weeds pushing through the joints, and a general grayness that no amount of rain seems to fix. You’ve probably wondered whether a pressure washer would solve it — or make it worse.
The honest answer is: it depends entirely on how it’s done. The wrong PSI strips joint sand. The wrong nozzle etches the surface. And cleaning without sealing means you’re back to square one by next spring. Here’s what the process actually looks like when it’s done right.
Pressure Washing Paver Driveways: The Right Settings and Technique
The most common mistake homeowners make is treating paver driveways like concrete slabs — cranking the pressure up and going to town. Pavers aren’t slabs. They have joints filled with sand, individual units that can shift, and surfaces that vary significantly by material. What works on a plain concrete pad can destroy a paver driveway in the same afternoon.
For most concrete pavers in Nassau County, the safe working range is 500 to 1,500 PSI. Sealed pavers can handle up to 2,500 PSI, but unsealed pavers with sand-filled joints should stay at the lower end of that range. A 25-degree green nozzle is the standard choice for even cleaning across a flat surface, and keeping the wand at least 12 inches from the surface prevents concentrated damage to joints and edges.
The bigger upgrade is switching from a standard wand to a professional 20-inch surface cleaner. It distributes pressure evenly across a wide path, eliminates the streak marks you get from wand cleaning, and moves across a full driveway in a fraction of the time. It also contains the spray, which matters when you have landscaping or garden beds right along the edges.
Best Way to Clean Travertine Pavers Without Etching the Surface
Travertine is one of the most popular choices for pool decks and patios across Nassau County’s North Shore — Great Neck, Manhasset, Port Washington — and it’s also one of the most misunderstood materials when it comes to cleaning. It looks durable. It isn’t, at least not in the way concrete is.
Travertine is a natural limestone-based stone. It’s porous, softer than concrete, and highly reactive to acidic cleaners. The combination of high pressure and the wrong cleaning solution can permanently etch the surface, leaving it dull, rough, and damaged in ways that can’t be undone. This is not a recoverable mistake.
The right approach starts with pressure. Travertine should be cleaned at 800 to 1,200 PSI maximum — well below what most people use on a standard driveway. Pair that with a 40-degree nozzle, which fans the spray wide enough to clean effectively without concentrating force on one spot, and keep the standoff distance generous. Getting too close with even moderate pressure will pit the surface over time.
The cleaning solution matters just as much. Travertine requires a pH-neutral, stone-safe cleaner — nothing acidic, nothing alkaline. Muriatic acid, which some contractors use on concrete to remove staining, will dissolve travertine on contact. Even common household cleaners with citric acid can cause subtle etching that accumulates with repeated use.
After cleaning, travertine needs to be sealed with a penetrating impregnating sealer rather than a topical film-forming product. Topical sealers sit on top of the stone and can trap moisture inside the porous surface, especially through Nassau County’s freeze-thaw winters. A penetrating sealer soaks into the stone, creates an internal moisture barrier, and lets the surface breathe — which is exactly what natural stone needs to stay in good condition long-term.
If you’re not certain what type of pavers you have, or if you’ve inherited a property with existing stone work and no documentation, this is exactly the situation where material-specific expertise matters. Getting it wrong isn’t just cosmetically bad — it’s permanent.
Power Washing Pavers With Polymeric Sand: What You Need to Know Before You Start
Polymeric sand is the professional standard for paver joints. It’s a blend of fine sand and a polymer binder that activates with water and hardens into a firm, stable joint — resistant to weeds, ants, and the kind of gradual erosion that leaves pavers wobbly and uneven. If your driveway was installed or restored in the last decade, there’s a good chance the joints were filled with it.
Here’s the problem: pressure washing can dislodge polymeric sand, especially if the joints are older or if the pressure is too high. Once the sand is gone, you’ve got open joints — and open joints are an invitation for every weed seed that blows across your driveway. Ants find their way in. Water channels through. The pavers start to shift.
The technique for cleaning pavers with polymeric sand joints is straightforward but unforgiving of shortcuts. Keep the pressure at or below 1,500 PSI. Use a surface cleaner attachment rather than a direct wand, which concentrates force in a narrow line directly over joints. Keep the nozzle moving — never hold it stationary over a joint. And avoid blasting at a steep angle into the joint itself.
After washing, inspect every joint. Even careful cleaning can displace sand in areas where the existing fill was thin or already compromised. Any open or low joints need to be refilled with fresh polymeric sand before sealing. This step gets skipped more often than it should, and it’s one of the main reasons driveways that look great right after cleaning are overrun with weeds within a single season.
The refill process itself requires some care. The new sand needs to be swept into the joints, compacted, and then activated with a controlled water application — not a full-pressure rinse, which would just wash it back out. Once it cures, it locks in place and the driveway is ready for sealer.
This is the full sequence that actually delivers lasting results: clean, inspect, refill joints, allow to dry completely, then seal. Each step depends on the one before it. Compressing or skipping steps is how you end up with a driveway that looks good for three months and then goes right back to where it started.
Why Nassau County Driveways Need More Than a Basic Rinse
Nassau County’s climate puts paver driveways through a specific kind of stress that homeowners in warmer or drier regions simply don’t deal with. Freeze-thaw cycles through the winter expand and contract paver joints repeatedly, eroding sand and widening gaps with every cycle. Salt air from the South Shore — Long Beach, Oceanside, Freeport, Baldwin — accelerates surface degradation and leaves white efflorescence deposits on paver faces. And the county’s densely treed neighborhoods, from Levittown to Garden City to Syosset, mean shaded driveways that stay damp and grow algae faster than most homeowners expect.
Most Long Island pavers benefit from professional cleaning every two to three years. Pavers in shaded areas or near heavy tree cover — the kind of oak and maple canopy you see throughout Massapequa and Plainview — may need attention annually. Waiting too long doesn’t just mean more cleaning work. It means more joint erosion, more biological growth embedded into the surface, and in some cases, structural shifting that’s more involved to correct.
Does Pressure Washing Alone Actually Fix a Nassau County Paver Driveway?
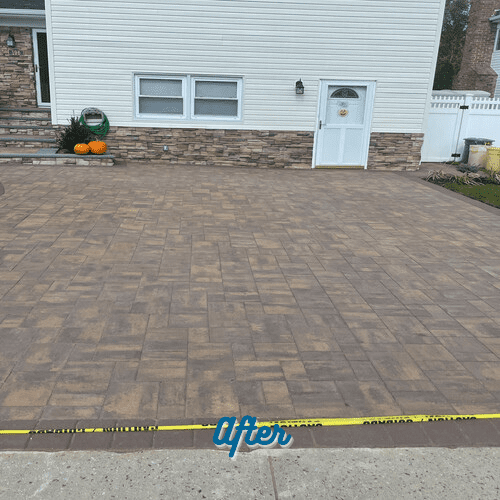
Cleaning without sealing is one of the most common reasons homeowners feel like professional paver services didn’t hold up. The driveway looks great for a few months, then the algae comes back, the staining returns, and it feels like the money was wasted. The cleaning wasn’t the problem — the missing step was.
Pressure washing removes what’s on the surface: dirt, biological growth, staining, salt deposits. What it doesn’t do is create any barrier against what comes next. An unsealed paver surface is porous and open. Water penetrates freely. Organic material settles into the texture and starts growing again. On Long Island, where humidity is high and biological growth is aggressive, this cycle can play out in a single season.
Sealing after cleaning changes the equation. A professional-grade water-based urethane sealer — the kind formulated for Long Island’s specific conditions — fills the surface pores, creates a moisture barrier, enhances color, and stabilizes the joint sand below. It won’t yellow over time the way lower-grade products do, and it’s specifically engineered to handle the freeze-thaw stress that cracks and degrades consumer sealers.
The timing of sealing matters too. Pavers need to be completely dry before any sealer is applied — typically 24 to 48 hours after washing, depending on conditions. Sealing over damp pavers traps moisture inside, causing the sealer to turn cloudy or white. This is called blushing, and it’s one of the most frustrating outcomes of a rushed job. It’s also entirely preventable. We monitor weather conditions and don’t seal until the surface is ready, even if that means rescheduling. That’s the difference between a sealer that lasts three to five years and one that fails before winter.
For Nassau County homeowners who’ve had a bad experience with a previous cleaning company, this is usually where things went wrong. Not the pressure washing itself, but what came after — or didn’t.
When Should Nassau County Homeowners Call a Professional Instead of DIY?
Renting a pressure washer from a home improvement store in Hicksville or Hempstead and spending a Saturday on your driveway is a reasonable idea — until it isn’t. Consumer-grade machines lack the consistent PSI control, GPM flow rate, and surface cleaner attachments that professional equipment provides. The result is often uneven cleaning, stripped joints, and in some cases, surface etching that permanently dulls the paver face.
The DIY approach also tends to stop at cleaning. Refilling polymeric sand joints, selecting the right sealer for the specific material, applying it evenly without trapping moisture — these are steps that require the right products and enough experience to know what can go wrong. A homeowner doing this for the first time on a $15,000 driveway is taking on meaningful risk for the sake of saving a service fee.
There are situations where the call is obvious. If your pavers are travertine or natural stone, professional cleaning is strongly recommended — the damage from incorrect technique is irreversible. If you have significant oil staining, biological growth that’s embedded into the surface, or joints that are severely eroded, the job requires pre-treatment, material-specific pressure settings, and a complete clean-sand-seal sequence that’s difficult to execute correctly without professional equipment.
We’ve worked with homeowners across Nassau County — from Plainview and Syosset to Long Beach and Merrick — who came to us after a DIY attempt left their driveway in worse shape than before. Stripped joints, milky sealer, uneven surfaces. In most cases, the driveway was restorable. But the repair added cost and time that wouldn’t have been necessary with a professional approach from the start.
The honest answer to “can I do this myself” is: sometimes, for basic concrete pavers in good condition, with the right equipment and realistic expectations. But if you’re dealing with natural stone, old or damaged joints, significant staining, or you simply want results that hold up for years rather than months, professional service is the more reliable path — and in Nassau County’s real estate market, where curb appeal directly affects property value, the investment tends to pay for itself.
Ready to Restore Your Nassau County Paver Driveway the Right Way?
Pressure washing a paver driveway isn’t complicated, but it is specific. The right pressure for the material, the right nozzle, the right sequence — clean, inspect, refill joints, dry completely, then seal — and the right products for Long Island’s climate. Skip a step or get the settings wrong and the results don’t hold.
If your driveway is showing its age — stained, faded, weedy, or just not what it used to look like — the answer is almost never replacement. In most cases, a proper clean-and-seal will restore it to better than it’s looked in years, at a fraction of what new pavers would cost.
We’ve been doing this work across Nassau County for years, with nearly 50 years of combined experience and a straightforward approach: show up on time, do the job right, and leave the property cleaner than we found it. If you’re ready to get your driveway looking the way it should, reach out to us for a free estimate.
Article details:
- Published by:
- Paver Savers
- Published to:
- Last modified:
- August 17, 2026
Share:
Continue learning: