Paver Cleaning: Materials to Methods Explained
Not all pavers clean the same way. Here's what actually works — by material, by method, and by season — for Nassau County homeowners.
Share:

Summary:
If your pavers have gone from sharp and clean to green, gray, or just plain embarrassing, you’re not alone. Most Nassau County homeowners don’t realize how quickly outdoor hardscapes deteriorate — or how much of that deterioration is preventable. The good news is that most pavers, even ones that look like they’re past saving, can be fully restored with the right process. The not-so-good news is that doing it wrong — wrong pressure, wrong chemicals, wrong order of operations — can make things significantly worse. This guide walks you through what paver cleaning actually involves, what changes based on your material, and what separates a result that lasts from one that needs to be redone in six months.
Paver Types: Why the Material You Have Changes Everything
Walk through any neighborhood in Massapequa, East Meadow, or Garden City and you’ll see a dozen different paver types within a few blocks. Brick driveways, concrete patio pavers, travertine pool surrounds, bluestone walkways — Nassau County homeowners use all of them, and each one responds differently to cleaning. What works beautifully on a concrete paver can etch the surface of natural stone. What’s perfectly safe for brick can destroy a travertine tile if you’re not careful about chemical selection.
Understanding your paver material isn’t just a technicality — it determines the pressure used, the cleaning products applied, and whether sealing is even appropriate at that stage. Skipping this step is one of the most common reasons DIY paver cleaning goes sideways.
Different Paver Types and How Each One Gets Cleaned
Concrete pavers are the most forgiving. They’re dense, durable, and can handle higher pressure — up to around 3,000 PSI in some cases — without surface damage. That said, even concrete pavers have joint sand that can be blasted out if you’re using a narrow wand nozzle instead of a commercial surface cleaner. The surface itself may be fine while the joints slowly lose all their sand, which leads to weed growth, instability, and eventually pavers that start to rock or shift underfoot.
Brick pavers are more porous than concrete, which means they absorb water — and cleaning chemicals — more readily. They respond well to lower pressure and wider fan nozzles, typically 40 degrees or more. Brick is also more susceptible to efflorescence, those chalky white mineral deposits that appear on the surface over time. If you seal over efflorescence without treating it first, you lock those stains in permanently. That’s not a cosmetic inconvenience — it requires complete stripping and re-application to fix.
Natural stone — travertine, bluestone, limestone — is where things get genuinely unforgiving. Travertine is particularly common around Nassau County pool surrounds, and it’s also particularly vulnerable to acidic cleaners. Vinegar, which plenty of people reach for as a “natural” cleaning solution, will etch travertine and limestone surfaces. The damage is visible and irreversible. Pressure should stay well below 1,500 PSI for most natural stone, and the cleaning products used need to be pH-neutral or specifically formulated for the material. With natural stone, the margin for error is narrow — which is exactly why material knowledge matters before anyone picks up a pressure wand.
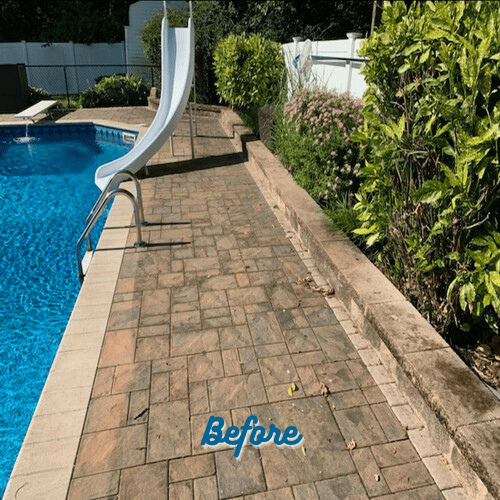
Best Way to Clean Travertine Pavers Without Damaging the Surface
Travertine is one of the most popular choices for pool decks and patios across Nassau County’s South Shore communities — Long Beach, Atlantic Beach, Oceanside, and beyond. It looks elegant, it stays cool underfoot in summer, and it holds up well in the right conditions. But it’s also one of the most misunderstood paver materials when it comes to cleaning.
The biggest mistake people make with travertine is using the wrong cleaner. Acidic products — including many common household cleaners and even some commercial degreasers — react with the calcium carbonate in travertine and cause etching. That shows up as dull, rough patches that can’t be buffed out. Once the surface is etched, the only fix is grinding and refinishing, which is expensive and not always possible depending on the tile thickness.
The right approach for travertine starts with a pH-neutral cleaner and low-pressure rinsing. Organic growth like algae and mildew — which is common in Nassau County’s humid coastal climate — can usually be addressed with a gentle, stone-safe biocide before washing. Pressure should be kept low and consistent, with a wide nozzle to avoid concentrated impact on any one area. After cleaning, travertine should be sealed with a penetrating sealer that soaks into the stone rather than sitting on top of it — this protects the surface from moisture, salt air, and the freeze-thaw cycles that are genuinely destructive to porous stone in Nassau County winters.
The short version: travertine rewards patience and the right products. It punishes shortcuts.
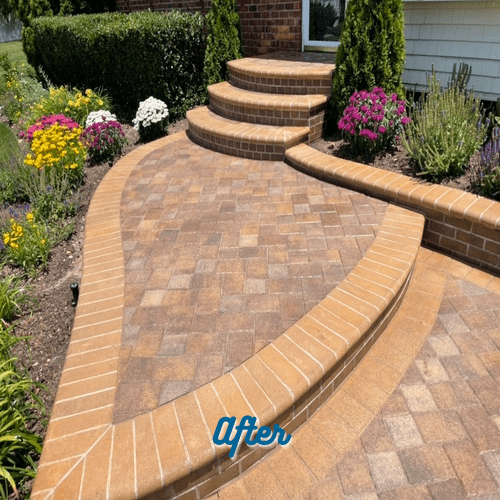
Power Washing Brick Pavers: What the Process Actually Looks Like
Brick paver cleaning is probably the most common service request we get across Nassau County, and it’s also the one with the widest gap between what a good job looks like and what a rushed job looks like. A proper brick cleaning isn’t just pointing a pressure washer at the surface and moving on. It’s a sequence — and the sequence matters.
Before any water touches the surface, weeds and organic growth in the joints need to come out. Then the surface gets pre-treated for any staining or efflorescence. Then it gets washed. Then it dries completely. Then — and only then — does sealing happen. Skipping or reordering any of those steps produces results that look fine for a few weeks and then fail visibly.
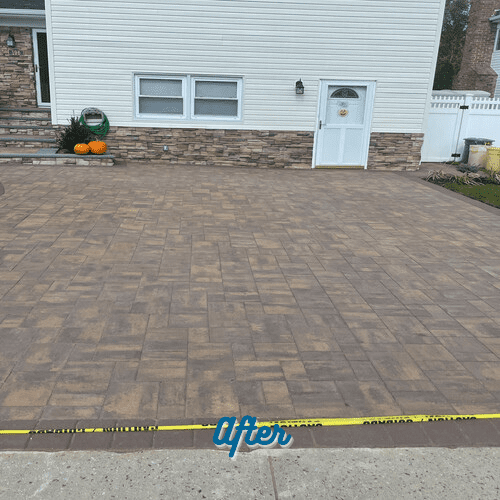
Power Wash Paver Driveway: What Nassau County Homeowners Should Know
A paver driveway takes more abuse than almost any other hardscape surface on your property. Vehicle weight, oil and fluid drips, ice melt chemicals in winter, and direct sun in summer all combine to break down both the surface and the joint sand faster than a patio or walkway. In Nassau County, where most households have two cars and driveways that see daily use, this wear adds up quickly.
Power washing a paver driveway isn’t just about appearance. When joint sand erodes — which happens gradually and isn’t always obvious until pavers start to shift — the structural integrity of the entire surface is compromised. Pavers are designed to flex slightly as a system, which is what makes them more durable than poured concrete in freeze-thaw conditions. But that system depends on properly filled joints. Once the sand is gone, individual pavers start to rock, edges crack, and the surface becomes uneven.
The right approach for a paver driveway involves a commercial-grade surface cleaner rather than a wand. Surface cleaners — the round, spinning head units we use — distribute pressure evenly across the cleaning path, which means no streaking, no concentrated pressure on individual pavers, and no accidental stripping of joint sand. After cleaning, joints are assessed and resanded with polymeric sand where needed, and then the surface is sealed to protect against oil penetration, UV fading, and moisture infiltration before the next winter hits.
One thing worth knowing: power washing prices for a paver driveway typically run between $135 and $210 for the wash alone, but that number doesn’t include resanding or sealing. A full-service cleaning, resanding, and sealing job for a driveway will cost more — and last significantly longer than a wash-only service.
Power Washing Pavers With Polymeric Sand: Getting the Order Right
This is where a lot of well-intentioned paver cleaning jobs go wrong, and it’s worth spending a moment on because the consequences are visible and expensive to fix.
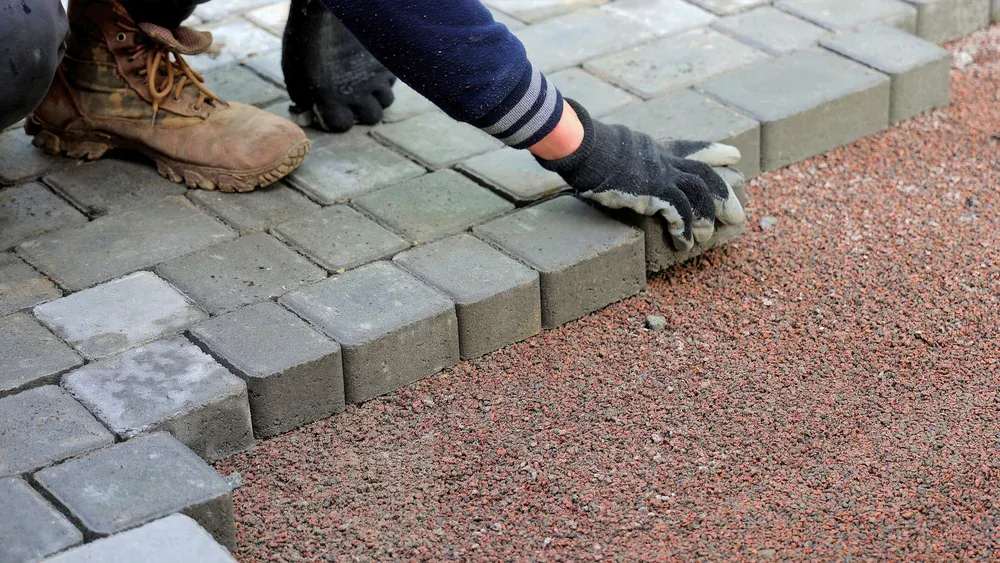
Polymeric sand is the joint filler that holds a paver surface together. Unlike regular sand, it contains binding agents that activate with water and harden into a firm, weed-resistant joint. It’s what keeps weeds from re-establishing between your pavers every spring, and it’s what keeps the joints from washing out in heavy rain. If your pavers have weeds coming back constantly no matter what you do, failed or missing polymeric sand is almost always the reason.
Here’s where the order of operations becomes critical: polymeric sand must be installed after cleaning but before sealing. If you seal first and then try to add sand, the sealer prevents the sand from bonding properly to the paver edges. If you pressure wash after installing new polymeric sand without giving it time to fully cure, you wash it right back out. And if you skip the sand entirely and just seal, you’re sealing a surface with compromised joints that will continue to allow weed growth and moisture infiltration underneath the sealer.
The correct sequence is: clean the surface thoroughly, treat any efflorescence, allow the surface to dry completely, install polymeric sand in the joints, activate and allow it to cure, then apply sealer. That’s the process we follow on every job in Nassau County, whether it’s a small patio in New Hyde Park or a full driveway and walkway system in Saddle Rock Estates. The sequence isn’t optional — it’s what makes the results last two to three years instead of two to three months.
One more thing about power washing pavers with polymeric sand already in place: if your existing sand is in good condition, we can clean the surface without disturbing it when using the right equipment. The key is pressure control and nozzle selection. A consumer pressure washer on a narrow setting will strip sand out of joints in seconds. A commercial surface cleaner at the right PSI won’t. This is one of the clearest practical differences between professional equipment and what you can rent from a home improvement store.
Paver Cleaning and Sealing: What a Long Island Property Actually Needs
Nassau County is a tough environment for outdoor pavers. The freeze-thaw cycles, the coastal salt air, the humidity, the ice melt chemicals on driveways every winter — all of it adds up faster than most homeowners expect. The pavers that hold up well over time aren’t necessarily better quality. They’re the ones that get maintained correctly.
The best way to clean a paver patio, driveway, or pool surround is the one that matches the material, respects the process, and finishes with proper sealing to protect what you just cleaned. Done right, a full cleaning and sealing job extends the life of your pavers by years and keeps them looking the way they did when they were first installed.
If your pavers have been on your to-do list for a while, or if you’ve had a bad experience with a company that didn’t know what they were doing, we’re worth a conversation. We’ve been doing this work across Nassau and Suffolk counties for a long time, and we’re straightforward about what your pavers need and what it’s going to take to get them there.
Article details:
- Published by:
- Paver Savers
- Published to:
- Last modified:
- June 17, 2026
Share:
Continue learning: